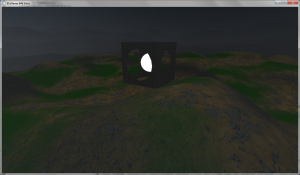
I’m working on a 64k intro and decided to render scenes, where most of their content is based on triangle meshes. I also want to display some raytraced objects at the same time. Both rendering methods should use multisampling, and the painter’s algorithm should be simulated correctly as expected using Z-Tests. Before we enter into details, here is the picture of the result (click for a larger version):

The terrain and the hollow cube are triangle meshes, and the white sphere is raytraced. I want to explain how I set up the rendering pipeline.
First, the entire mesh-based geometry is rendered into a rendertarget with several multisampling textures (In my case I have 3 textures with 4xMSAA), so that I can store amongst other things the color and the depth. I’m not storing the depth value exactly, instead I’m storing the world-space distance between the geometry and the camera. This could be the output struct of a pixel shader rendering the geometry:
struct PSOUT
{
    float4 Color;
    float4 Normal;
    float4 Depth;
};

// Later, in the pixel shader:
    PSOUT r;
    r.Color = float4(color, 1);
    r.Normal = float4(normalize(normal), 1);
    r.Depth = float4(length(worldPos - WorldCameraPosition), 0, 0, 1);
    return r;
Then I render a fullscreen quad for the raytracing step. For this to work I need to pass the inverse of the ViewProjection matrix to the shader. This is the vertex shader for the fullscreen quad:
struct VIn
{
    float2 Pos: POSITION;
};

struct VOut
{
    float4 ProjPos: SV_POSITION;
    sample float2 toPos: TEXCOORD0;
    float2 texCoords : TEXCOORD1;
};

VOut VS(VIn a)
{
    VOut result;
    result.ProjPos = float4(a.Pos, 0, 1);
    result.texCoords = float2(a.Pos.x, -a.Pos.y) * 0.5 + 0.5;
    result.toPos = a.Pos;
    return result;
}
Notice the “sample” interpolation method introduced with Shader Model 4.1. This forces the pixel shader to run per-sample instead of per-pixel, enabling the nice antialiased raytracing rendering. Setting up the a raytracing framework is a piece of cake now. Here is an excerpt of the fragment shader:
Texture2DMS<float4,4> tx: register(t0);

float4 PS(VOut a, uint nSampleIndex : SV_SAMPLEINDEX) : SV_TARGET
{
    uint x, y, s;
    tx.GetDimensions(x, y, s);

    float4 toPos = mul(float4(a.toPos, 0, 1), ViewProjInverse);
    toPos /= toPos.w;
    float3 o = WorldCameraPosition; // ray origin
    float3 d = normalize(toPos - WorldCameraPosition); // ray direction

    float3 c = float3(1, 3, 1); //sphere center
    float r = 1; // sphere radius
    INTER i = raySphereIntersect(o, d, c, r); // ray sphere intersection

    if (i.hit)
    {
        float z = tx.Load(a.texCoords * float2(x,y), nSampleIndex).x;
        if (z > length(i.p - WorldCameraPosition))
            return float4(1, 1, 1, 1);
    }

    return float4(0,0,0,0);
}
First of all you’ll notice that I’m using a multisampling texture to read back the depth values from the previous mesh rendering pass. Then you’ll see that I’m using the SV_SAMPLEINDEX semantic, which is needed for sampling that texture. This way I ensure a perfect sample match between the depth texture reads and raytracing output writes. After reading the depth value from the texture, I do a simple comparison between it and the distance between the raytraced geometry and the camera in world space. If that test passes, I render the sphere, otherwise I return an alpha value of 0. Alpha blending does the rest.
The result is a nice integration between raytracing and mesh-based rendering using multisampling.